A script is a sequence of actions that takes place when the script is activated. When turned on, they run through their sequence of actions, then turn themselves off. Just like customizing entities and automations, scripts can be created and edited using either the .yaml files or with the Script editor in the Configuration tab on your Home Assistant front end. I find the .yaml files to be more efficient, but think it’s important to share both methods.
Creating Scripts Using .yaml Files
- If you want to create a script using the .yaml file method, go ahead and open your scripts.yaml file. You’ll be faced with an empty file.
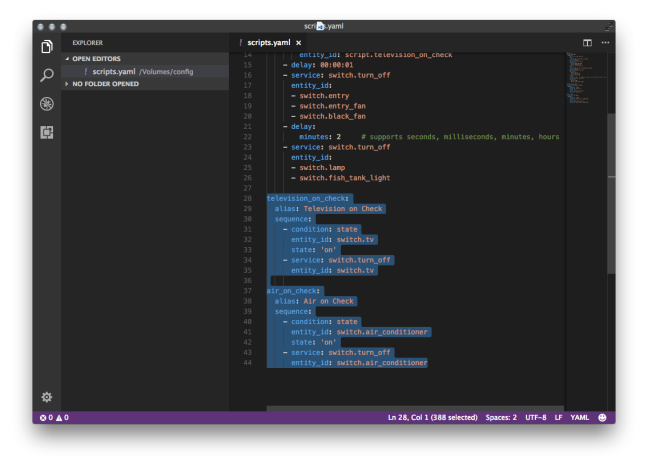
- My favorite script is my bedtime script. It turns on my bedroom, turns off the living room devices, and waits 2 minutes to turn off the living room lamp. Here’s what it looks like.

This file contains bidirectional Unicode text that may be interpreted or compiled differently than what appears below. To review, open the file in an editor that reveals hidden Unicode characters.
Learn more about bidirectional Unicode characters
| bedtime: | |
| alias: Bedtime | |
| sequence: | |
| – service: script.turn_on | |
| data: | |
| entity_id: script.air_on_check | |
| – delay: 00:00:01 | |
| – service: switch.turn_on | |
| entity_id: | |
| – switch.bedroom_lamp | |
| – switch.bedroom_fan | |
| – service: script.turn_on | |
| data: | |
| entity_id: script.television_on_check | |
| – delay: 00:00:01 | |
| – service: switch.turn_off | |
| entity_id: | |
| – switch.entry | |
| – switch.entry_fan | |
| – switch.black_fan | |
| – delay: | |
| minutes: 2 | |
| – service: switch.turn_off | |
| entity_id: | |
| – switch.lamp | |
| – switch.switch.fish_tank_light |
- Notice, my script also fires off 2 other scripts; my air_on_check and tv_on_check scripts. I added the 1 second delays to allow time for those scripts to finish.
- My TV and A/C remotes each only have a single on/off button. So the on signal is the same as the off signal.
- Scripts can use conditions, similar to automations. These scripts keep my TV and A/C from turning on when the bedroom script is activated.
This file contains bidirectional Unicode text that may be interpreted or compiled differently than what appears below. To review, open the file in an editor that reveals hidden Unicode characters.
Learn more about bidirectional Unicode characters
| television_on_check: | |
| alias: Television on Check | |
| sequence: | |
| – condition: state | |
| entity_id: switch.tv | |
| state: 'on' | |
| – service: switch.turn_off | |
| entity_id: switch.tv | |
| air_on_check: | |
| alias: Air on Check | |
| sequence: | |
| – condition: state | |
| enitity_id: switch.air_conditioner | |
| state: 'on' | |
| – service: switch.turn_off | |
| entity_id: switch.air_conditioner |
- Remember to save and check your configuration, then restart Home Assistant.
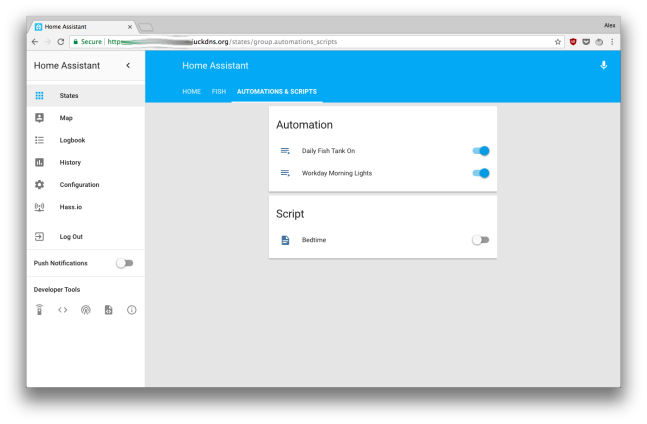
- If you’ve changed your default view, you may want to add your scripts to a group. I don’t use the air_on_check and tv_on_check outside of the bedtime script, so I will just be adding the bedtime script to my front end. I’ll add mine to my Automations tab
This file contains bidirectional Unicode text that may be interpreted or compiled differently than what appears below. To review, open the file in an editor that reveals hidden Unicode characters.
Learn more about bidirectional Unicode characters
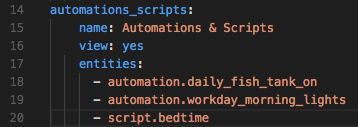
| automations_scripts: | |
| name: Automations & Scripts | |
| view: yes | |
| entities: | |
| – automation.daily_fish_tank_on | |
| – automation.workday_morning_lights | |
| – script.bedtime |
- After saving, checking the configuration, and restarting Home Assistant, you should now be able to use your scripts from the front end.

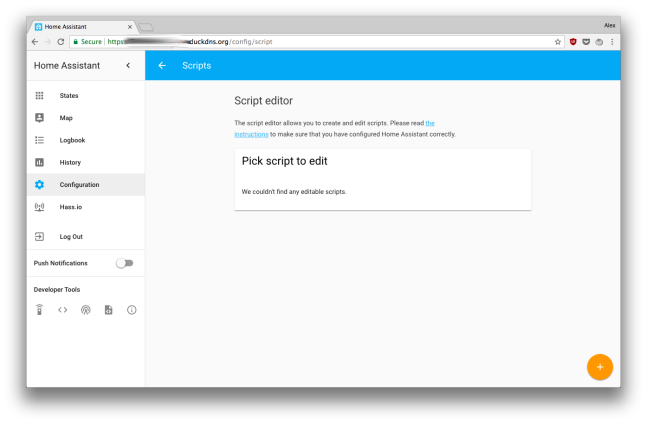
Creating Scripts Using Script Editor
*Scripts created using the Editor will not be reachable by your Custom Alexa Skills. You’ll need to build them in the YAML file due to naming issues from the Editor*
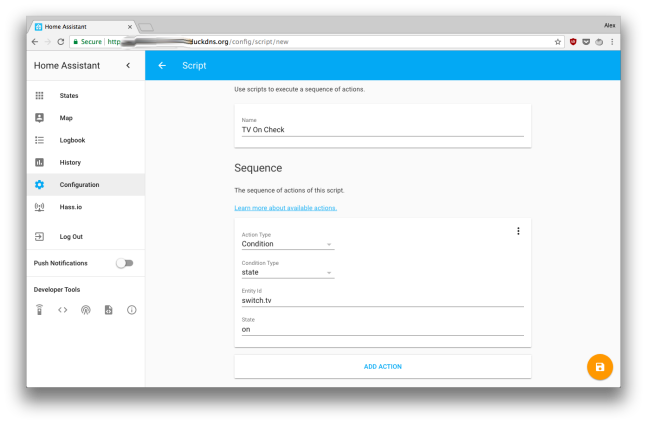
Just like customizations and automations, scripts can also be created and edited from the front end. Because my bedtime script calls two smaller scripts, I’ll start with those. I’ll use a condition, similar to the automation I showed in my last post. These scripts will turn the TV or A/C off only if Home Assistant recognizes them as being on.
- Navigate to the Script editor.
- This script, when activated, will turn off the TV only if Home Assistant registers the TV as being on.

- I made the same script for the A/C.
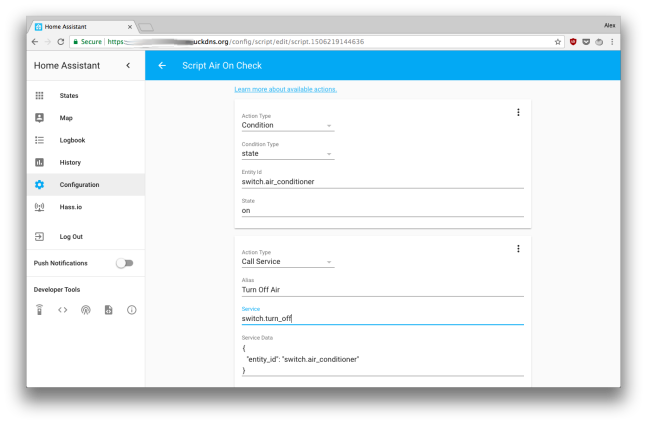
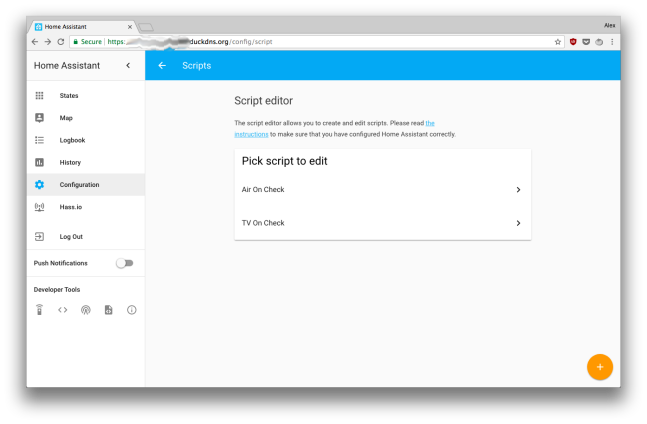
- Here they both are finished in the editor.
- Next, you’ll need to find them in the States section of the Developer Tools, so you can reference them.

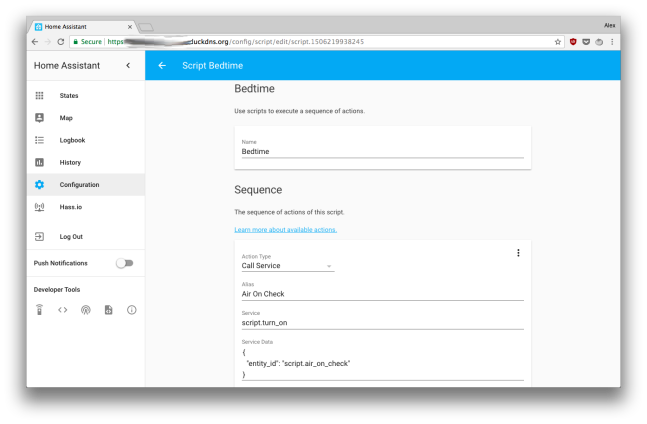
- Go back to the editor and you can start building the bedtime script. Each entity will be added separately. I’ve tried combining entities, but haven’t been able to get it to work. Here we go:


- If you’ve changed your default view, you may want to add your scripts to a group. I don’t use the Air On Check and TV On Check outside of the bedtime script, so I will just be adding the bedtime script to my front end.
- Check your States section in the Developer Tools to find your script’s ID.

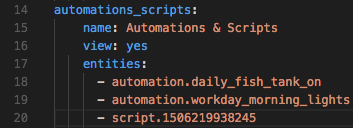
- I’ll add mine to my Automations tab in my groups.yaml
This file contains bidirectional Unicode text that may be interpreted or compiled differently than what appears below. To review, open the file in an editor that reveals hidden Unicode characters.
Learn more about bidirectional Unicode characters
| automations_scripts: | |
| name: Automations & Scripts | |
| view: yes | |
| entities: | |
| – automation.daily_fish_tank_on | |
| – automation.workday_morning_lights | |
| – script.bedtime |
- After saving, checking the configuration, and restarting Home Assistant, you should now be able to use your scripts from the front end.
- Building this script in the Script editor required more work than in the .yaml file.
- Since I added the script to a group, I find it more efficient to edit the script in the .yaml files since I had to edit the group file anyway.
- Remember that Alexa can run scripts Consider updating your entities for voice control.
Now we’ve got that out of the way. I wanted to show you how to get your scripts up and running so I could teach you how to build your own Alexa skills to interact with your Home Assistant set up.
If these guides have been helpful to you , please share them! If you have any questions, please reach out to me in the comments. Thanks for visiting!

One thought on “Home Assistant Scripts – 2 Ways”